Drywall, also known as sheetrock or gypsum board, forms the foundation of smooth and flawless walls in modern homes. While it’s a durable and cost-effective building material, it’s not immune to damage.
Over time, you may notice dents, cracks, holes, or even significant damage caused by accidents, wear and tear, or environmental factors. The good news is that repairing drywall is a manageable task that doesn’t require professional expertise. Anyone can restore their walls to perfection with the right tools, techniques, and patience.
This guide will walk you through everything about patching and repairing drywall. Whether fixing small nail holes or dealing with water-damaged sections, this detailed article will equip you with the knowledge and confidence to tackle any drywall repair project.
Let’s get started!
Read more: How to Remove Wallpaper in a Few Simple Steps?
Why is Drywall Repair Important?
Drywall repairs aren’t just about aesthetics—they play a crucial role in maintaining the integrity of your home. A small hole or crack might not seem like a big deal, but it can lead to bigger problems over time.
Damaged drywall can allow moisture to seep in, weakening the wall structure and leading to mold growth. Even tiny imperfections can make your home look unkempt. Repairing drywall promptly prevents these issues and ensures your home stays beautiful and safe.
The Types of Drywall Damage
Before you grab your tools, it’s important to identify the type of damage you’re dealing with. Different types of drywall damage require different repair techniques.
- Small Holes: These are the most common types of drywall damage and include nail holes, pinholes, and minor dents caused by furniture or accidental bumps. They’re typically less than an inch in diameter and easy to fix.
- Medium-Sized Holes: Medium-sized holes are usually caused by doorknobs hitting the wall, roughhousing, or furniture mishaps. They’re larger than small holes but still manageable for a DIY repair. These holes typically require reinforcement before patching.
- Large Holes: Large holes or gashes in drywall can result from severe impacts, such as moving heavy furniture, or structural issues. These require more complex repairs, often involving cutting and replacing sections of drywall.
- Cracks: Cracks often appear due to the natural settling of your home or changes in temperature and humidity. While they might seem minor, they need to be addressed to prevent further spreading.
- Water Damage: Water-damaged drywall is a serious issue. If left untreated, it can lead to mold and structural weakening. Water-damaged sections often need to be replaced entirely.
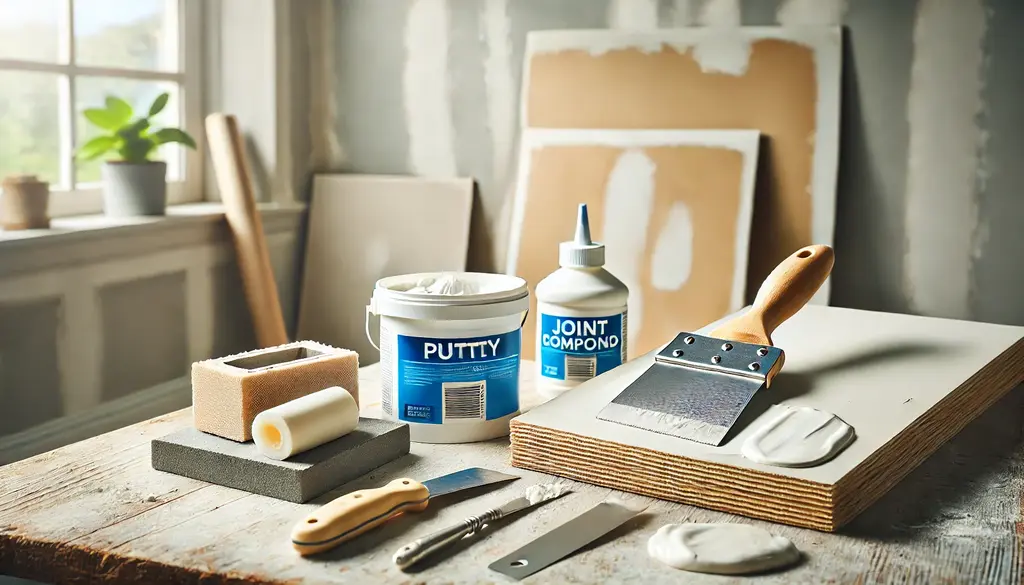
Tools and Materials You’ll Need
Having the right tools and materials is essential for any drywall repair project. Here’s a comprehensive list of what you’ll need:
Tools
- Putty knife (2-inch and 6-inch sizes)
- Utility knife
- Drywall saw or jab saw
- Sanding block or sanding sponge
- Drill (for larger repairs)
- Screwdriver
- Paintbrush or roller
Materials
- Joint compound (also called mud)
- Spackle (for small holes)
- Drywall tape (paper or fiberglass mesh)
- Drywall patch kits (optional)
- Drywall screws
- Replacement drywall sheets (for large holes)
- Primer and matching paint
- Dust mask and safety goggles
Pro Tip: If tackling a larger project, invest in a lightweight sanding pole and a mud pan to make the job easier.
Preparing for Drywall Repair
Proper preparation is key to achieving professional-looking results. Follow these steps before you start:
- Clean the Area: Wipe the damaged area with a damp cloth to remove dust, grease, and debris.
- Inspect the Damage: Determine the type and extent of the damage. For water damage, ensure you’ve resolved the underlying issue (e.g., a leaky pipe or roof).
- Protect Your Space: Lay down a drop cloth to catch debris and protect your floors. Use painter’s tape to shield baseboards and adjacent walls.
- Gather Your Tools: Organize all your tools and materials so you can work efficiently without interruptions.
Step-by-Step Guide to Patching and Repairing Drywall
Here’s the step-by-step process for patching and repairing your drywalls:
1. How to Patch Small Holes?
Small holes, such as those left by nails or screws, are the simplest to repair. Here’s how to fix them:
- Clean the Hole: Remove loose material around the hole using a utility knife or fingernail.
- Apply Spackle or Joint Compound: Scoop a small amount of spackle onto a putty knife and press it into the hole. Spread it evenly, ensuring the hole is filled.
- Smooth the Surface: Scrape away excess spackle with the putty knife, leaving a thin, smooth layer.
- Let It Dry: Allow the spackle to dry according to the manufacturer’s instructions (usually a few hours).
- Sand and Paint: Once dry, sand the area lightly with a fine-grit sandpaper. Wipe away dust, apply a primer, and paint to match the wall.
Pro Tip: For small holes, lightweight spackle works best because it dries quickly and doesn’t shrink.
2. Repairing Medium-Sized Holes
You’ll need to use a patch for holes larger than 1 inch but smaller than 6 inches. Follow these steps:
- Prepare the Hole: Cut away any loose or damaged drywall using a utility knife or drywall saw. Create a clean, square opening.
- Insert a Patch: Use a pre-made patch kit or cut a piece of drywall slightly larger than the hole. Secure the patch with adhesive or screws.
- Reinforce with Tape: Apply drywall tape over the seams. Fiberglass tape is self-adhesive and easier to work with, while paper tape provides a smoother finish.
- Apply Joint Compound: Spread a thin layer of joint compound over the tape and patch, feathering the edges to blend with the wall.
- Sand and Repeat: Let the compound dry, sand it smooth, and apply additional layers if needed. Finish with primer and paint.
3. Fixing Large Holes
Large holes require more effort and precision. Here’s how to repair them:
- Cut Out the Damaged Area: Use a drywall saw to cut out a square or rectangular section around the damage. Ensure the edges are straight.
- Install a Backing Support (Optional): For extra stability, attach a piece of wood or furring strip behind the hole and secure it to the wall.
- Cut and Attach a Drywall Patch: Measure and cut a piece of drywall to fit the hole. Secure it with screws to the wall studs or backing support.
- Tape and Mud the Seams: Cover the seams with drywall tape and apply a thin layer of joint compound. Feather the edges for a seamless finish.
- Sand, Prime, and Paint: Once dry, sand the area smooth, prime it, and paint to match the wall.
4. Addressing Ripped Drywall Paper
Ripped drywall paper is a common issue when removing old wallpaper or tape. Follow these steps:
- Trim Loose Edges: Use a utility knife to remove any frayed or loose paper.
- Seal the Surface: Apply a drywall primer or PVA glue to prevent bubbling and create a smooth base.
- Apply Joint Compound: Spread a thin layer of joint compound over the area and smooth it out.
- Sand and Finish: Sand lightly, then prime and paint to complete the repair.
5. Repairing Water-Damaged Drywall
Water damage requires extra care to prevent mold and further issues:
- Fix the Source of the Leak: Identify and resolve the cause of the water damage before repairing the drywall.
- Remove Damaged Sections: Cut out all water-damaged drywall, including any soft or discolored areas.
- Install New Drywall: Replace the damaged section with a new piece of drywall and secure it with screws.
- Use Mold-Resistant Materials: Apply mold-resistant tape and joint compound to prevent future problems.
- Sand, Prime, and Paint: Sand the area smooth, apply a mold-resistant primer, and finish with paint.
Common Mistakes to Avoid
Even with careful planning, mistakes can happen. Avoid these common pitfalls:
- Skipping Sanding: Sanding between layers of compound ensures a smooth finish. Don’t rush this step.
- Overloading Joint Compound: Applying too much compound at once can result in lumps and uneven surfaces.
- Painting Without Priming: Primer helps the paint adhere and prevents the repaired area from standing out.
When to Call a Professional?
While most drywall repairs can be handled by homeowners, some situations require professional help. If the damage is extensive, involves mold or structural issues, or you’re short on time, it’s best to hire a contractor.
Read more: How to Prep a Wall for Tile?
Conclusion
Repairing drywall may seem intimidating at first, but with the right guidance, it’s a skill anyone can master. From small holes to large repairs, this guide has provided you with detailed instructions to tackle any issue.
With a little patience and effort, you can restore your walls and enjoy a polished, professional-looking finish. So roll up your sleeves, grab your tools, and start patching! Your walls—and your wallet—will thank you.