Proper insulation is the backbone of an energy-efficient home. It plays a crucial role in maintaining indoor comfort, reducing energy bills, and even enhancing the overall structure of your house. Whether you’re looking to keep your home warm in winter or cool during the summer, insulation is a must-have.
Installing it might sound intimidating, but with the right knowledge and tools, it’s a manageable task, even for a DIY enthusiast. This guide will take you through everything you need to know about installing insulation, step by step.
Learn more: Attic Insulation Cost Guide [2024]
The Importance of Proper Insulation
Before diving into the installation process, let’s understand why insulation is essential. Good insulation acts as a barrier, preventing the transfer of heat between your home’s interior and exterior. In winter, it helps keep the warmth inside, reducing the need for heating. In summer, it prevents heat from entering, cutting down on cooling requirements.
By maintaining consistent indoor temperatures, insulation can significantly lower your energy bills, improve your home’s comfort, and even act as a sound barrier. Additionally, well-installed insulation can prevent moisture buildup, which could lead to mold and structural damage over time.
Pre-Installation Considerations
Here is what you need to know when installing insulation:
Understand R-Values and Local Building Codes
The effectiveness of insulation is measured by its R-value, which indicates its resistance to heat flow. The higher the R-value, the better the insulation.
Different parts of your home (attics, walls, crawlspaces) require varying R-values, and this can also change depending on your climate zone. Always check local building codes or consult an expert to determine the right R-value for your home. This ensures that your insulation meets regulatory standards and provides the best energy efficiency.
Measure the Area You Plan to Insulate
Before you start shopping for materials, measure the area that needs insulation. Knowing the square footage will help you calculate how much insulation you need to buy.
Make sure to measure both the width and height of the space, and consider any obstacles such as windows, doors, and outlets. This will also help you plan the installation process more efficiently.
Seal Any Air Leaks
One of the biggest mistakes homeowners make is installing insulation without addressing air leaks first. Gaps around windows, doors, plumbing, and electrical wiring can let in drafts, undermining the effectiveness of your insulation.
Use caulk and spray foam to seal these gaps before you begin insulating. This will ensure that your home is airtight and that your insulation performs as expected.
Choosing the Right Type of Insulation
Here is how to choose the right insulation type:
Fiberglass Batts and Rolls
Fiberglass insulation is one of the most common types used in homes. It’s easy to handle, relatively inexpensive, and suitable for DIY projects. It comes in batts (pre-cut lengths) or rolls, making it ideal for insulating walls, floors, and ceilings.
However, fiberglass can cause skin irritation, so be sure to wear protective clothing and a mask while handling it.
Spray Foam Insulation
Spray foam is excellent for sealing gaps and insulating irregular spaces. It expands to fill cracks and voids, creating a tight air barrier. Spray foam is particularly useful around window frames, electrical outlets, and other areas where traditional insulation might not fit well.
However, applying spray foam requires special equipment, so you may want to hire a professional if you’re not comfortable using it.
Blown-In Insulation
Blown-in insulation is typically used in attics or areas where adding extra layers of insulation is necessary. It is made from loose fibers of fiberglass, cellulose, or mineral wool and is blown into place using a machine.
This type of insulation is great for reaching tight or oddly shaped spaces, but renting the equipment can add to the cost.
Rigid Foam Boards
Rigid foam boards are dense panels that provide excellent thermal resistance and are often used in basements and exterior walls. They offer good moisture resistance, which makes them suitable for damp environments like crawlspaces.
Rigid foam boards can also be cut to fit, making them versatile for various applications.
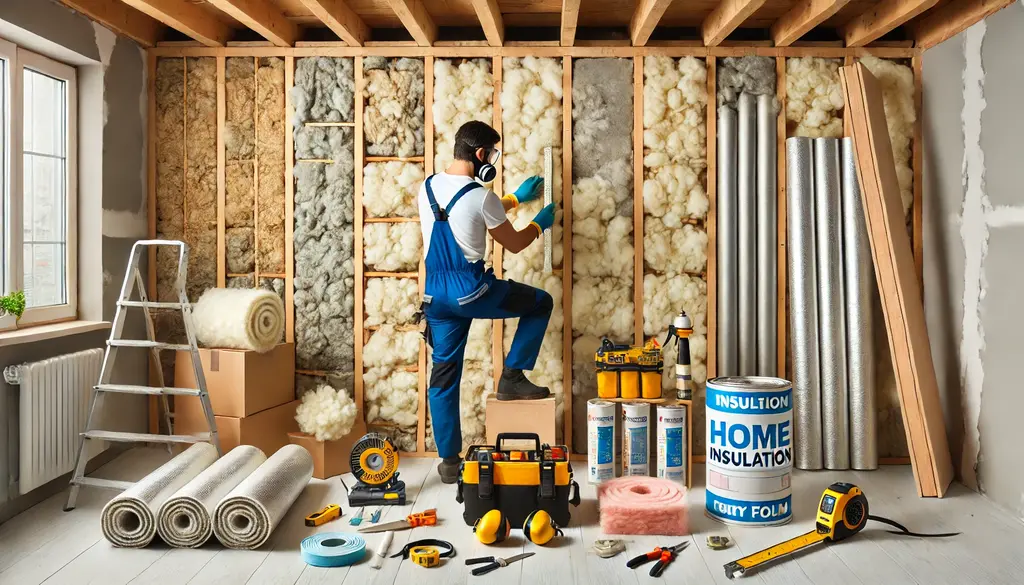
Tools and Materials You’ll Need
To install insulation, you’ll need a few essential tools:
- Utility knife (for cutting insulation to size)
- Tape measure
- Staple gun (for securing insulation in place)
- Caulk gun (for sealing air gaps)
- Safety gear (gloves, goggles, and a dust mask)
- Plastic sheeting (for moisture control)
Having everything prepared will save time and make the process smoother.
Step-by-Step Guide to Installing Insulation
Here is a step-by-step guide to installing insulation:
Step 1: Choose Your Insulation Type and R-Value
Start by selecting the insulation material best suited for your project. Check the manufacturer’s label for the R-value to ensure it matches the recommended level for your region and specific installation area (walls, attic, basement). For example, in colder climates, higher R-values are often needed for attics to prevent heat loss.
Step 2: Prepare the Space
Clear the area where you’ll be working. If you’re insulating walls, remove any old or damaged insulation first. Check for signs of mold or moisture, as you don’t want to trap these problems behind new insulation. Address any leaks before proceeding. For attics and crawlspaces, ensure there is proper
ventilation in those areas to prevent moisture buildup, as this can compromise the insulation and lead to mold growth. Lay down plastic sheeting in crawlspaces to act as a vapor barrier, protecting the insulation from ground moisture.
Step 3: Installing Insulation in Walls
For wall insulation, tuck fiberglass batts snugly between the studs. The insulation should fit tightly but not be compressed, as this reduces its effectiveness. If using faced insulation (with a paper or foil backing), ensure the vapor barrier faces the warm side of the wall (usually inside) to prevent moisture from passing through.
Secure the insulation using a staple gun, being careful not to tear the vapor barrier. For irregular spaces, cut the batts to fit precisely, ensuring there are no gaps.
Step 4: Insulating an Attic
When insulating an attic, it’s best to start by laying batts or rolls between the floor joists. Make sure the insulation extends to the edges but does not block the soffit vents, which help maintain airflow.
For attics that need additional insulation, you can add another layer perpendicular to the first to cover any gaps and reduce heat transfer further.
Keep insulation clear of heat sources like recessed lighting or exhaust fans to avoid fire hazards. Using foam board insulation around the attic hatch can also help to minimize heat loss through this common weak spot.
Step 5: Insulating Crawlspaces
Crawlspaces can be tricky due to moisture issues. Start by covering the ground with plastic sheeting as a vapor barrier. For vented crawlspaces, install insulation batts between the floor joists, ensuring they fit snugly.
If your crawlspace is unvented, consider insulating the walls instead. Foam board insulation can be glued or fastened directly to the walls, providing a continuous barrier against cold and moisture. Remember to insulate around any pipes to prevent them from freezing during cold weather.
Step 6: Finishing Touches
Once the primary insulation is in place, take care to insulate around openings and fixtures. Use spray foam or caulk to seal gaps around windows, doors, and electrical outlets. For recessed lights, install appropriate insulation covers to maintain safety.
Double-check all areas for gaps or compressions, as these can significantly reduce the overall effectiveness of the insulation.
Safety Tips for Installing Insulation
Working with insulation, especially fiberglass, can cause irritation and discomfort. Always wear gloves, goggles, a dust mask, and long sleeves to protect your skin and eyes.
Be cautious around electrical wiring, and turn off power to the area you are insulating if necessary. When using spray foam, ensure the area is well-ventilated, as fumes can be harmful. Follow all manufacturer safety guidelines and local building codes to avoid potential hazards.
Common Mistakes to Avoid
Here are some common mistakes to avoid:
- Compressing Insulation: One common mistake when installing insulation is compressing the material, which reduces its effectiveness. Insulation needs to maintain its loft to trap air, which is what provides the insulating properties. Always ensure it fits snugly without being squashed.
- Ignoring Air Leaks: Installing insulation without sealing air leaks is like putting on a coat without zipping it up. You won’t get the full benefit. Make sure to seal gaps around windows, doors, pipes, and electrical outlets before adding insulation. This will ensure that your insulation performs at its best.
- Leaving Gaps and Spaces: Insulation that doesn’t fill the space between studs or joists will allow heat to escape, reducing efficiency. Always cut insulation to the correct size and shape to avoid leaving gaps. For difficult-to-reach areas, consider using spray foam or blown-in insulation to fill any voids.
- Maintenance and Aftercare: Insulation is not a “set it and forget it” solution. Over time, insulation can settle, shift, or become damaged, reducing its effectiveness. Periodically check your insulation, especially in attics and crawlspaces, to ensure it is still in good condition. Look for signs of moisture, mold, or pest infestations, as these issues can compromise the insulation. Replace or add new insulation as needed to maintain proper energy efficiency.
Conclusion
Installing insulation is one of the most effective ways to improve your home’s comfort, reduce energy costs, and promote sustainability. While the process may seem daunting at first, with the right materials, tools, and knowledge, it’s entirely possible to do it yourself.
By carefully selecting the appropriate type of insulation, preparing your space, and following a step-by-step approach, you can ensure your home stays cozy in the winter and cool in the summer. Don’t forget to prioritize safety and take the time to seal all air leaks for maximum effectiveness.
If you’re still unsure about tackling this project yourself, consider consulting a professional. Properly installed insulation will pay off in energy savings and comfort for years to come, making it a worthwhile investment in your home.