Do you want to install RV solar panels on your camper or RV and don’t know where to start? RV solar panels offer a reliable way to break away from electric hookup sites, giving you the freedom to explore off-grid and embrace dry camping or boondocking. Imagine having the power to run lights, charge devices, and even power larger appliances—all without the hum of a generator or the need for a nearby outlet.
Why choose RV solar panels over traditional power sources? With solar, you’re investing in a sustainable energy solution that can keep your camper powered up using only sunlight. Whether your RV lifestyle is occasional camping or a full-time adventure, having a solar panel system in place opens up the possibility of going wherever the road leads.
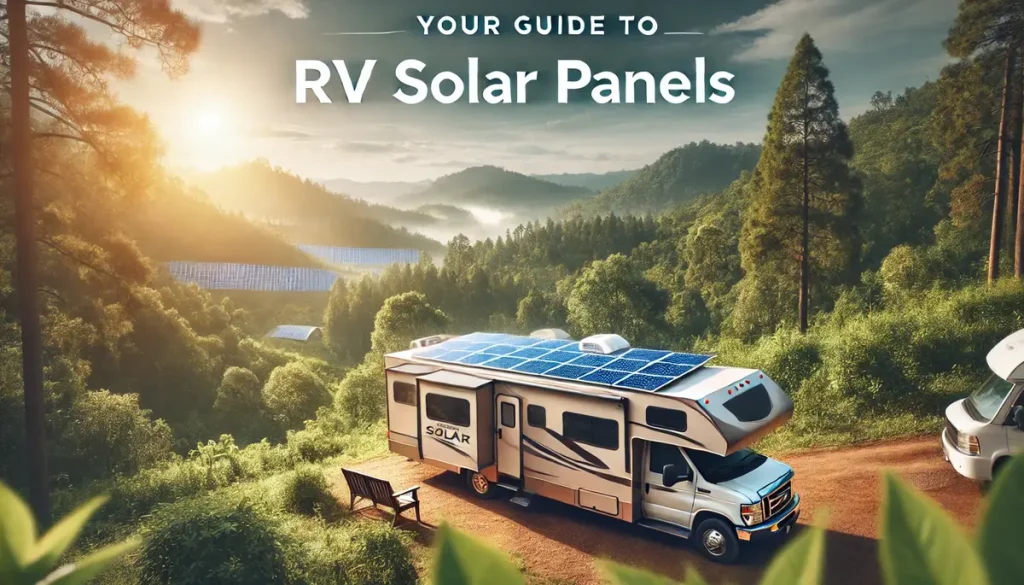
In this guide, we’ll cover everything you need to know about choosing, installing, and maintaining RV solar panels. From calculating your power needs to understanding the different types of systems available, this complete guide will walk you through each step to help you make an informed choice. Get ready to transform your RV setup and experience the freedom of off-grid power!
Read More: Portable Solar Panels: What Are They & How Do They Work?
What Are RV Solar Panels and How Do They Work?
RV solar panels are specialized devices designed to harness sunlight and convert it into electricity, which can then be used to power various appliances in your RV. These panels use photovoltaic cells, typically made from silicon, to capture sunlight and generate DC power. This clean, renewable power can then be stored in batteries and used as needed, making RV solar panels a great option for those looking to stay off-grid.
The main advantage of RV solar panels is their ability to provide sustainable energy independent of campgrounds or external power sources. Unlike noisy gas-powered generators, solar panels offer a quiet and emission-free alternative that is both eco-friendly and efficient. This makes them especially useful for boondocking or camping in remote locations where power sources may be scarce.
Another reason RV solar panels are a popular choice is the range of options available to fit different needs. From small portable setups to large, roof-mounted arrays, RV owners can choose systems that fit their power requirements and travel habits. Portable panels are ideal for short trips or minimal power needs, while permanent setups can support larger electrical demands for extended stays.
For those new to RV solar power, understanding the components involved is essential. Besides the panels, systems often include batteries to store energy, inverters to convert power, and charge controllers to manage electricity flow. Together, these elements provide a seamless and self-sufficient power solution tailored to the open road.
Types of RV Solar Panel Systems
When it comes to RV solar panel systems, two main types dominate the market: portable and permanent systems. Each type has unique advantages, making it easier to choose based on your specific needs and RVing lifestyle.
Portable RV Solar Panel System
Portable RV solar panel systems offer the most flexibility. These setups are compact, easy to store, and can be set up wherever there is optimal sunlight exposure. A typical portable system consists of solar panels that fold up for storage, often resembling a suitcase, which you can place around your RV for maximum sun exposure.
One key advantage of portable RV solar panels is their ease of use. These systems typically come with plug-and-play functionality, making setup a breeze without any specialized installation tools. Many RVers find portable systems ideal for short trips or occasional use, as they provide enough power for lights, device charging, and topping off batteries.
Portable systems are generally more affordable than permanent setups, although they may cost more per watt due to their convenience. However, it’s essential to consider that while portability is a benefit, you’ll need to set up and secure the panels each time you camp. Portable solar panels are also more susceptible to weather conditions, so it’s important to store them when they’re not in use.
Permanent RV Solar Panel System
Permanent RV solar panel systems are mounted directly to your RV’s roof, providing a more consistent and hands-free power source. Once installed, these panels continuously collect sunlight as long as they’re exposed, making them ideal for RVers looking to stay off-grid for extended periods. Permanent systems are usually more powerful than portable ones and can support larger appliances.
A major advantage of a permanent system is that it doesn’t require repeated setup and teardown. As long as the panels are clean and unobstructed, they’ll generate power automatically, even while driving. These setups are often preferred by full-time RVers who need reliable energy to run refrigerators, microwaves, and air conditioners.
Installation of permanent panels is typically more costly upfront, as it requires professional installation to secure them properly on the roof. However, the investment can pay off over time with greater efficiency and convenience. Permanent solar panels also tend to be more durable, making them well-suited to harsh outdoor environments.
Permanent systems allow for roof-mounted panels to take advantage of otherwise unused space, maximizing the solar potential without taking up living or storage areas. For those willing to make the initial investment, a permanent RV solar panel system can be a worthwhile addition to your off-grid toolkit.
How Many Solar Panels Do You Need for Your RV?
Determining how many RV solar panels you need depends on your power requirements. By assessing the wattage of your devices and appliances, you can estimate the amount of solar power necessary to keep everything running smoothly.
To begin, calculate your daily wattage needs by noting the power consumption of each device and estimating the hours of use per day. Here’s a simple way to break down your power requirements:
- Identify Device Power: Look for the watts or amps on each device label.
- Convert to Watts if Needed: If only amps are listed, multiply by the volts (e.g., 3 amps x 120 volts = 360 watts).
- Daily Usage: Multiply watts by hours of use to get daily watt-hours (e.g., 360 watts x 0.5 hours = 180 watt-hours).
Once you have the total daily watt-hours, divide by the average wattage output of your solar panels. A 100-watt panel, for example, may generate around 350 watts per day in ideal conditions, though this will vary based on factors like weather and sunlight.
As a rough guide, many RV setups require around 400–600 watts of solar power to sustain typical off-grid usage, though higher needs may require additional panels. Consulting with a solar installation professional can also help clarify the best setup for your specific energy demands.
Essential Components for an RV Solar System
Beyond the solar panels themselves, there are several essential components that make up a complete RV solar system. Each plays a crucial role in ensuring your setup runs smoothly and efficiently, even in varying weather conditions.
Battery Bank
A battery bank is necessary to store the energy generated by your RV solar panels for later use. Most batteries are rated in amp-hours (Ah) and come in 12-volt or 24-volt options. Choosing a battery bank that can hold enough power to last through cloudy days or nights is key for consistent power.
Battery capacity should be sized according to your energy needs, ideally with enough power to last a couple of days. This provides a buffer for days when solar generation might be low. Some common types of RV batteries include lead-acid, lithium-ion, and AGM batteries, each with its own advantages in terms of cost, longevity, and maintenance.
Inverter
An inverter converts the DC power generated by solar panels into AC power, which is compatible with standard RV outlets. The size of the inverter you need depends on the total wattage of your devices at any given time, and it’s advisable to choose an inverter rated slightly higher than your maximum power needs.
Inverters also come with a range of features, such as built-in chargers or dual-output ports, which can add functionality to your solar setup. For safety, consider an inverter with overload protection to avoid potential damage to your devices and batteries.
Charge Controller
A charge controller regulates the flow of energy from the solar panels to the battery bank, preventing overcharging and potential battery damage. Many charge controllers include monitoring functions that display battery health and charge levels, helping you stay informed about your system’s status.
Charge controllers come in two main types: PWM (Pulse Width Modulation) and MPPT (Maximum Power Point Tracking). MPPT controllers are more efficient and effective for larger solar systems, though they tend to be pricier than PWM models.
Factors to Consider When Choosing RV Solar Panels
Selecting the right RV solar panels involves considering several factors to ensure optimal performance and compatibility with your needs. From materials to efficiency, each detail impacts how well your system will serve you on the road.
- Materials: Monocrystalline and polycrystalline panels are common, with monocrystalline offering higher efficiency and durability.
- Flexibility: Rigid panels are best for flat roofs, while flexible options fit curved surfaces.
- Wattage and Efficiency: Higher wattage means more power generation, but check efficiency rates for realistic expectations.
- Portability: Portable panels offer flexibility but need manual setup, while mounted panels provide hands-free operation.
Understanding these factors can help you choose a setup that meets both your energy demands and travel preferences.
Top-Rated RV Solar Panels in 2024
When selecting RV solar panels, consider options that cater to different needs, from budget-friendly setups to high-performance solutions for long-term off-grid use. Here’s an in-depth look at some of the top-rated models in 2024, each with unique strengths for RVers seeking sustainable, reliable power on the road.
Renogy 200W 12-Volt Solar RV Kit: Best Overall for Efficiency and Easy Installation
The Renogy 200W 12-Volt Solar RV Kit stands out for its efficiency and user-friendly design, making it a top choice for first-time users and seasoned RVers alike. The kit includes two 100-watt monocrystalline solar panels, known for their high energy output and durability, especially in low-light conditions.
- Key Features: The Renogy kit includes a 30A PWM charge controller, which helps monitor and optimize battery charging. The controller also offers LED indicators that allow users to track the system’s status, preventing overcharging and system overload.
- Ease of Installation: Designed with RVers in mind, the kit features pre-drilled holes for quick installation and sturdy brackets to secure panels on the roof. For those who prefer DIY setups, this kit minimizes the complexity, and detailed instructions are included.
- Durability: Made from corrosion-resistant aluminum and equipped with tempered glass, these panels are built to withstand harsh weather. This means they’re reliable in high winds, snow, and intense sunlight, making them ideal for year-round travel.
- Ideal For: RV owners who want a high-efficiency, easy-to-install solution that works well in varying light conditions. The Renogy 200W kit is versatile enough for medium-sized RVs, campervans, and even small trailers.
Eco-Worthy 100W Solar Panel: Great Value Option for Budget-Conscious RVers
For those looking to power their RV affordably, the Eco-Worthy 100W Solar Panel offers excellent value without compromising on quality. This compact, high-efficiency panel provides a budget-friendly way to maintain an RV’s battery levels and power small devices.
- Key Features: The Eco-Worthy panel is simple yet effective, featuring a pre-installed junction box with MC4 connectors for easy setup. Despite its low price, it offers a high-efficiency rate, which means it generates a substantial amount of power relative to its size.
- Installation: With pre-drilled mounting holes, this panel is easy to mount on an RV roof. It’s compatible with various mounting brackets, and its compact size allows users to install multiple panels to increase power output without taking up excessive space.
- Durability: This panel is IP65 rated, meaning it’s protected against water spray and dust. The durable tempered glass and sealed frame make it weather-resistant, ideal for occasional campers or budget-conscious RVers who want basic power capabilities.
- Ideal For: Those new to RV solar power or budget-conscious travelers who need minimal power for lights, phone charging, or small appliances. Eco-Worthy’s 100W panel is an entry-level solution that provides consistent performance for essential power needs.
Go Power! Overlander 190W Solar Kit: High Power Output, Ideal for Maximum Energy Needs
The Go Power! Overlander 190W Solar Kit is tailored for RVers who need a robust power supply for extended off-grid living. With its high wattage and durability, this kit is designed to keep larger appliances, like refrigerators and microwaves, running smoothly during long boondocking trips.
- Key Features: The Overlander kit includes a 30A digital solar controller that provides system diagnostics and performance insights. Its large 190-watt monocrystalline panel offers exceptional efficiency, allowing it to charge batteries quickly even in moderate sunlight.
- Installation: Known for its straightforward installation process, this kit includes mounting brackets and hardware to make setup as simple as possible. The panel’s size is larger than standard 100-watt panels, so it’s best suited for RVs with ample roof space.
- Durability: Constructed with a rugged anodized aluminum frame and high-quality tempered glass, this panel is made to withstand tough conditions. It has an IP67-rated junction box, meaning it’s both dustproof and highly water-resistant, making it reliable in adverse weather.
- Ideal For: Full-time RVers and those with high energy needs, such as running multiple devices or large appliances. The Go Power! Overlander 190W kit is an excellent choice for extended off-grid living without compromising on power.
Renogy Flexible Monocrystalline Solar Panel: Lightweight and Perfect for Curved Roofs
The Renogy Flexible Monocrystalline Solar Panel is specifically designed for RVs with curved or irregular roof surfaces. Its flexible build can bend up to 248 degrees, making it ideal for Airstreams, vans, or other vehicles where traditional panels may not fit as well.
- Key Features: With a slim, bendable design, this panel can be installed on surfaces that other rigid panels cannot. It’s also monocrystalline, meaning it provides high efficiency and strong performance in both sunny and cloudy conditions.
- Installation: Unlike rigid panels, the flexible Renogy panel doesn’t require drilling. It can be secured using strong adhesives or Velcro straps, making it a great choice for those who don’t want to modify their RV’s roof permanently.
- Durability: Weighing only four pounds, this panel is highly portable and lightweight, but still features waterproofing and is durable enough to withstand the elements. While flexible, it’s not as sturdy as rigid panels, so it’s best suited for RVs that need lightweight solutions.
- Ideal For: RVs with non-flat roofs or those looking for an ultra-light, easy-to-install solar option. This panel is perfect for those with minimal energy needs or who want to supplement an existing solar setup without adding significant weight.
Bluetti PV350 Solar Panel: Portable with High Wattage, Ideal for Frequent Travelers
The Bluetti PV350 Solar Panel offers a high-wattage, portable power solution that folds compactly for easy storage. With a 350-watt capacity, this model is well-suited for RVers who frequently set up camp in remote locations but don’t want a permanent rooftop installation.
- Key Features: This panel has a high power output, allowing it to charge larger battery systems quickly. It features parallel-wired cells, ensuring that it continues to generate power even when partially shaded, which is useful in varied environments.
- Portability: The Bluetti PV350 is designed for portability, folding down to a size of about 35.6 by 24.1 inches, with a convenient carrying handle. While heavier than some portable panels at 30 pounds, its wattage-to-size ratio makes it an efficient option for those who prioritize power.
- Durability: Constructed with waterproof and dust-resistant materials, the PV350 is rugged enough for outdoor conditions. However, it should be stored when not in use to maintain longevity, as extended exposure can degrade its efficiency.
- Ideal For: RVers who need high-power portable solutions for frequent off-grid trips. The Bluetti PV350 is perfect for those who want the flexibility to set up and stow away their solar panels, with enough power to support more demanding energy needs.
How to Install RV Solar Panels on Your Own
Installing RV solar panels can be a rewarding DIY project that enhances your off-grid capabilities while allowing you to learn more about your RV’s power system. While it may seem daunting at first, the process is relatively straightforward with some basic tools and a clear plan. Here’s a guide to help you get started with your RV solar panel installation.
Gather Necessary Tools and Equipment
Before starting, ensure you have the tools and materials ready to streamline the installation process. Having the right tools on hand can save time and prevent interruptions.
- Basic Tools: You’ll need a cordless drill for securing brackets, screwdrivers for tightening bolts, and wrenches for adjustments. Wire cutters and strippers are essential for handling electrical wires safely and effectively.
- Solar Mounting Hardware: Most solar panel kits include brackets and screws specifically designed for mounting panels on RV roofs. Be sure to check that these items are included in your kit, as they’ll be crucial for a stable, secure installation.
- Safety Equipment: Installations involve working with electrical connections, so safety is paramount. Wear gloves to protect your hands, dielectric tools to prevent electrical conductivity, and safety goggles to guard against debris and accidental sparks.
Positioning and Mounting the Panels
Selecting the optimal placement on your RV roof is key for maximizing sunlight exposure. Typically, the best location is a flat, unobstructed area on the roof that gets direct sunlight most of the day. Consider the following steps for mounting:
- Dry Fit Panels: Lay out the solar panels on your RV roof to get a sense of how they’ll be positioned. This will allow you to identify any obstacles and ensure each panel will receive maximum sunlight.
- Mark Mounting Points: Once you’re satisfied with the placement, use a marker to indicate the mounting points for each panel. This ensures accurate alignment when it’s time to drill.
- Secure Brackets: Attach the mounting brackets to the roof at the marked points. Use the screws and washers provided in the kit, ensuring each bracket is tightly secured to prevent movement during travel.
Running and Connecting Cables
Properly routing and securing cables is crucial for safety and efficiency. Once the panels are mounted, follow these steps to connect them to your RV’s power system:
- Route Cables Carefully: Run the cables from the solar panels to the interior of the RV, ideally through existing cable conduits or via a small hole in the roof. Use weather-resistant cable glands to seal any entry points and prevent leaks.
- Secure Cables: Attach the cables to the roof using zip ties or cable clips. This prevents cables from flapping in the wind or being exposed to debris, reducing wear over time.
- Connect to Charge Controller and Battery Bank: Inside the RV, connect the cables from the solar panels to the charge controller. The controller manages power flow, preventing battery overcharge or discharge. Then, connect the controller to the battery bank, ensuring the correct polarity (+ to + and – to -) for each connection.
Testing and Final Adjustments
After connecting the panels, it’s essential to test the system to confirm everything is working as expected. This process ensures that your setup is secure, efficient, and ready for regular use.
- Check Connections: Verify that all connections are tight and secure. Loose connections can lead to power loss or even damage to your equipment. Use a multimeter to test voltage across connections to confirm power flow.
- Inspect Charge Controller and Inverter: Turn on the charge controller and inverter to ensure both components are functioning properly. The charge controller should display battery levels and charging status, while the inverter should be ready to convert DC power to AC.
- Monitor System Performance: After installation, monitor the performance of your RV solar panels over a few days. Check the charge controller display to ensure the batteries are charging as expected and that the panels are producing adequate power.
Are RV Solar Panels Worth It?
While RV solar panels require an initial investment, many RVers find the freedom and sustainability they provide well worth the cost. By reducing reliance on hookups and generators, RV solar panels allow you to explore remote locations without sacrificing power.
RV solar panels are ideal for those looking to go off-grid and enjoy the quiet of solar power over traditional fuel-powered alternatives. Whether it’s the eco-friendly benefits or the independence it provides, RV solar power can significantly enhance your travel experience.
For those who value sustainable travel and self-sufficiency, RV solar panels are more than just a power source—they’re an investment in a flexible and fulfilling RV lifestyle.