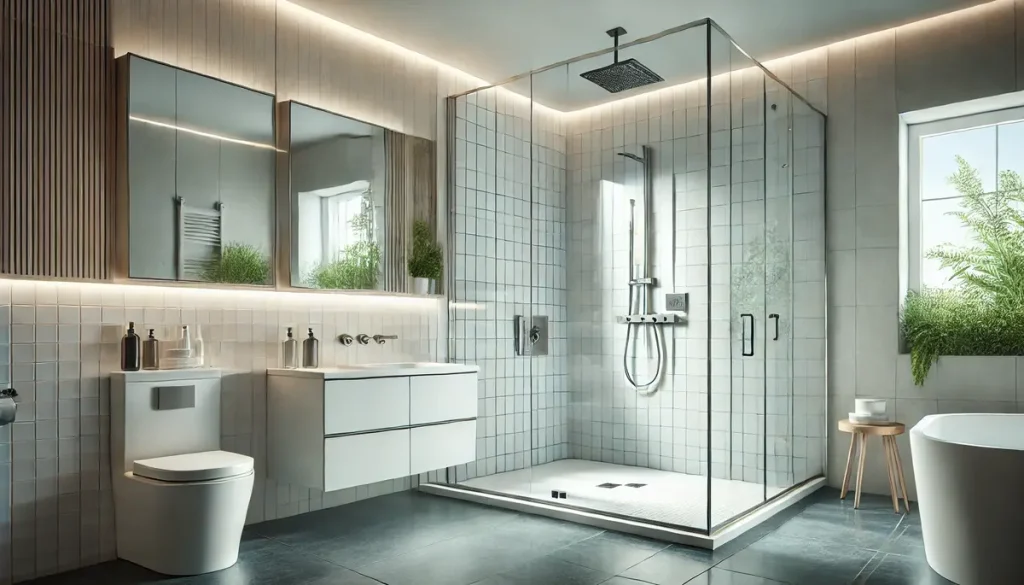
Are you remodeling your bathroom and thinking about installing or replacing your shower door? While glass shower installations can transform the look and feel of your space, certain mistakes can lead to costly problems over time. From doors that open awkwardly to issues with water leakage, there are numerous potential pitfalls that can disrupt your shower experience. How do you avoid these common glass shower installation mistakes and create a space that’s functional and aesthetically pleasing?
This blog covers essential tips and solutions to ensure your shower installation is a lasting success. Read on to make the most of your glass shower installation.
Read More: 50 Master Bathroom Ideas You Love This Year
05 Glass Shower Installation Mistakes and their Solutions
1. Swinging Door Limitations in Glass Shower Installation
When planning a glass shower installation, one common issue is the swinging door. Swinging doors can create problems in a small or awkwardly laid-out bathroom, and they may impact both functionality and appearance.
Swinging doors, including pivoting or hinged varieties, often open in a way that interferes with other bathroom elements, like cabinets or walls. In tight spaces, these doors can knock into objects, damaging the bathroom layout or creating an awkward shower experience. Additionally, these doors can transfer water from the shower to the floor, creating a slipping hazard.
The space a swinging door requires can make your bathroom feel smaller. You may envision a spacious, open bathroom, but the swing of the door can close in the area, impacting movement and making the space feel cramped. Consider the overall layout and how the door will affect accessibility before selecting this style.
Solution: Upgrade to a Space-Saving Shower Door Style
If a swinging door isn’t ideal, there are other styles available that can save space and enhance usability. Consider these options:
- Glass Sliding Doors: Sliding doors are versatile and save space. You can choose from multiple panels that either slide or remain fixed, allowing for smooth operation in various layouts.
- Bi-Fold Doors: Bi-fold doors, with two or three folding panels, are an excellent option for tight spaces, as they fold inward and don’t occupy additional room.
- Curved Shower Doors: Ideal for corner showers, curved doors add a unique aesthetic while conserving space. They require minimal maintenance and fit snugly into compact areas.
- Frameless Shower Doors: Though they require thick glass for stability, frameless doors create an open feel and showcase tile designs, enhancing both space and style.
Each of these styles can add value to your glass shower installation, offering practical and attractive solutions to common swinging door issues.
2. Fixing a Wobbly Glass Door in Your Shower Installation
Sometimes, an existing glass shower installation may have a door that wobbles. This instability often arises from the use of thin glass or inadequate framing, which builders sometimes choose to reduce costs. However, this compromise impacts long-term durability and safety.
A wobbly door creates a safety risk, as it can easily break or come loose, leading to potential injury. Thin glass also gives a less sturdy feel, which can detract from the bathroom’s appearance. For a secure and lasting installation, it’s essential to use glass with appropriate thickness and support.
In terms of style, a solid frame around the door not only enhances stability but also adds a finished look. However, some prefer the sleek look of frameless or semi-frameless doors. Each option provides varying levels of security and appearance, depending on personal preference and bathroom style.
Solution: Replace with a Frameless, Semi-Frameless, or Framed Door
When addressing a wobbly glass door, upgrading to one of these door types can improve stability and appearance. Here’s what to consider for each type:
- Semi-Frameless Doors: Offering mid-range pricing, semi-frameless doors provide durability without fully encasing the glass. These typically feature frames on some sides while leaving others open.
- Frameless Doors: Known for their open, airy feel, frameless doors use thick, tempered glass and create a seamless look. These require a stronger glass (around 3/8-inch to 1/2-inch thick) due to the lack of a frame for support.
- Framed Doors: With a complete frame around the glass, framed doors provide the most stability and reduce the risk of leaks. The frame also makes it easier to use thinner glass, balancing durability and cost.
Each of these options can help you achieve a secure, stable shower door that complements the overall design of your bathroom.
3. Making Practical Use of Shower Space in Glass Shower Installation
A glass shower installation needs careful consideration of space. Some bathrooms have awkwardly positioned showers that restrict accessibility, making cleaning and maintenance difficult.
Inaccessible areas within a shower can lead to mold and mildew growth, as damp, enclosed spaces encourage bacterial buildup. Poorly planned layouts may even lead to unreachable spots, making thorough cleaning challenging. To prevent such issues, ensure the shower layout maximizes the space, allowing for easy access.
Consider the type of glass for your shower door installation as well. Different types require varying levels of care, with reinforced glass often providing additional durability. Knowing what works best for your space can prevent future cleaning challenges.
Solution: Redesign the Shower Space for Accessibility
If you face consistent issues with space, consulting a professional can make a difference. A professional shower door installation expert can provide insights on creating a practical, accessible shower layout.
- Optimize Positioning: Placing the shower in a location that’s easy to reach enhances usability and makes cleaning simpler.
- Choose Accessible Glass Types: Certain glass types, like easy-clean or reinforced glass, are simpler to maintain and resist buildup.
- Prevent Mold and Mildew: Design layouts that ensure air circulation and avoid enclosed corners where mold might develop.
By working with an expert, you can redesign your glass shower installation to be both visually appealing and functional, preventing long-term issues.
4. Ensuring Proper Curb Slope for Effective Water Drainage
Another common glass shower installation issue is the slope of the shower curb. For water to drain effectively, the curb needs an inward slope to direct water into the shower area. A flat or improperly sloped curb can lead to water pooling on the bathroom floor, causing potential damage.
An inward slope between 1/8 to 1/4 inch is essential to prevent water from seeping outside the shower. Without this pitch, water can easily spill over and damage bathroom floors, leading to costly repairs over time. Properly sloped curbs not only maintain water flow but also prevent slipping hazards from excess moisture.
Incorrectly sloped curbs also create a messy appearance, as water stains and residue collect on the edges. Ensuring the right gradient enhances the look of the bathroom while keeping the area dry and clean.
Solution: Fix the Curb Slope for Better Drainage
Professional assistance is often needed to correct curb slope, especially if the initial installation did not follow best practices. Adjusting the slope ensures effective drainage and prolongs the life of your bathroom flooring.
- Hire a Shower Installation Expert: Experienced professionals understand slope requirements and can assess your current setup.
- Ensure a Smooth Drainage Path: Proper slope keeps water away from the bathroom floor, maintaining cleanliness and preventing water-related issues.
- Protect Bathroom Flooring: By fixing the slope, you protect surrounding areas from damage, saving on future repair costs.
With the right curb slope, your glass shower installation will be more durable, safe, and aesthetically pleasing.
5. Optimizing Shower Valve Placement for Comfort
One overlooked detail in glass shower installation is the position of the shower valve. Poor placement can make it difficult to turn on the water without stepping into the shower, often resulting in an uncomfortable cold splash or scalding hot water.
Having the valve positioned within easy reach prevents the inconvenience of getting soaked in the process. An improperly placed valve also restricts your ability to control water temperature before stepping inside, which can be especially unpleasant during colder months.
Improper valve placement also poses accessibility challenges for individuals with limited mobility. Ensuring the valve is easy to reach can make the shower experience more inclusive and comfortable for everyone.
Solution: Reposition the Shower Valve for Better Access
If the valve placement disrupts your shower experience, consider repositioning it to ensure comfort and accessibility. Working with a plumber can help you find the best spot for the valve without requiring a complete shower overhaul.
- Move the Valve for Easy Access: Positioning the valve close to the door makes it easier to adjust water temperature before stepping in.
- Consider Accessibility Needs: If accessibility is a concern, place the valve at a height and position that suits all users.
- Use a Hinged or Pivoting Door: These types of doors can enhance access if space permits, giving you greater control over water flow without entering the shower.
Relocating the shower valve can improve the functionality and comfort of your glass shower installation, creating a more enjoyable shower experience.
Essential Tools and Steps for Glass Shower Installation
Installing a glass shower door requires specific tools and materials to ensure a successful installation. Having the right equipment on hand is crucial for precision and safety.
For tools, you’ll need items such as a caulk gun, level, and drill with tile-compatible bits. These tools allow for precise installation, helping to avoid potential damage to tiles or glass. A well-installed shower door also enhances overall bathroom aesthetics.
Alongside tools, the right materials are essential. Silicone caulk, glass panels, and kit hardware are necessary for most installations. These materials contribute to both durability and aesthetic appeal, ensuring the shower remains functional for years.
Choosing the Right Glass Type for Your Shower Installation
When planning a glass shower installation, the type of glass you choose impacts the overall look, durability, and maintenance of your shower. From clear to frosted and textured options, each glass type offers distinct benefits and considerations.
Glass types such as tempered glass provide safety by shattering into small, rounded pieces instead of sharp shards, making it an ideal choice for shower installations. Frosted or opaque glass adds privacy, which can be beneficial if your bathroom layout includes open areas or large windows.
Maintenance is another critical factor. Certain glass types, like easy-clean or treated glass, reduce water spots and soap scum buildup, making them easier to maintain. For those looking for long-lasting clarity, consider glass with a hydrophobic coating, which resists dirt and helps water bead off the surface.
Key Points to Consider When Choosing Glass Type
- Privacy Needs: Decide whether clear or frosted glass suits your space based on privacy preferences.
- Safety Standards: Opt for tempered glass or laminated options to ensure safety in the event of breakage.
- Ease of Maintenance: Easy-clean or treated glass can reduce time spent on cleaning and maintain a clear look.
- Aesthetic Appeal: Textured or patterned glass can add a unique design element that enhances the overall bathroom style.
Adding this section will provide readers with valuable guidance on selecting glass types, helping them make informed decisions that align with both their aesthetic and functional needs.
Project Steps for Glass Shower Installation
Following a structured approach to installation can make the process smoother and reduce potential errors.
- Attach the First Panel: Secure the first panel to the wall using a level and glass drill bit for accuracy.
- Install the Second Panel: Use a straightedge to position the second panel parallel to the first.
- Secure Track Hardware: Attach the track and rollers to ensure smooth door movement.
- Hang the Door: Once track hardware is secure, hang the door and ensure it aligns properly with the track.
- Caulk the Installation: Seal all edges to prevent leaks, ensuring durability and a clean finish.
By following these steps, you can achieve a professional-looking glass shower installation.
Conclusion
Glass shower installations offer both aesthetic appeal and practical benefits. However, avoiding common mistakes is essential to ensure a lasting and safe installation. From choosing the right door style to proper valve placement and curb slope, each decision affects the overall functionality and appearance of your shower. Consulting professionals and selecting appropriate styles, tools, and materials can help you avoid costly issues down the road. For more remodeling tips and DIY insights, stay informed and make the most of your bathroom renovation project.